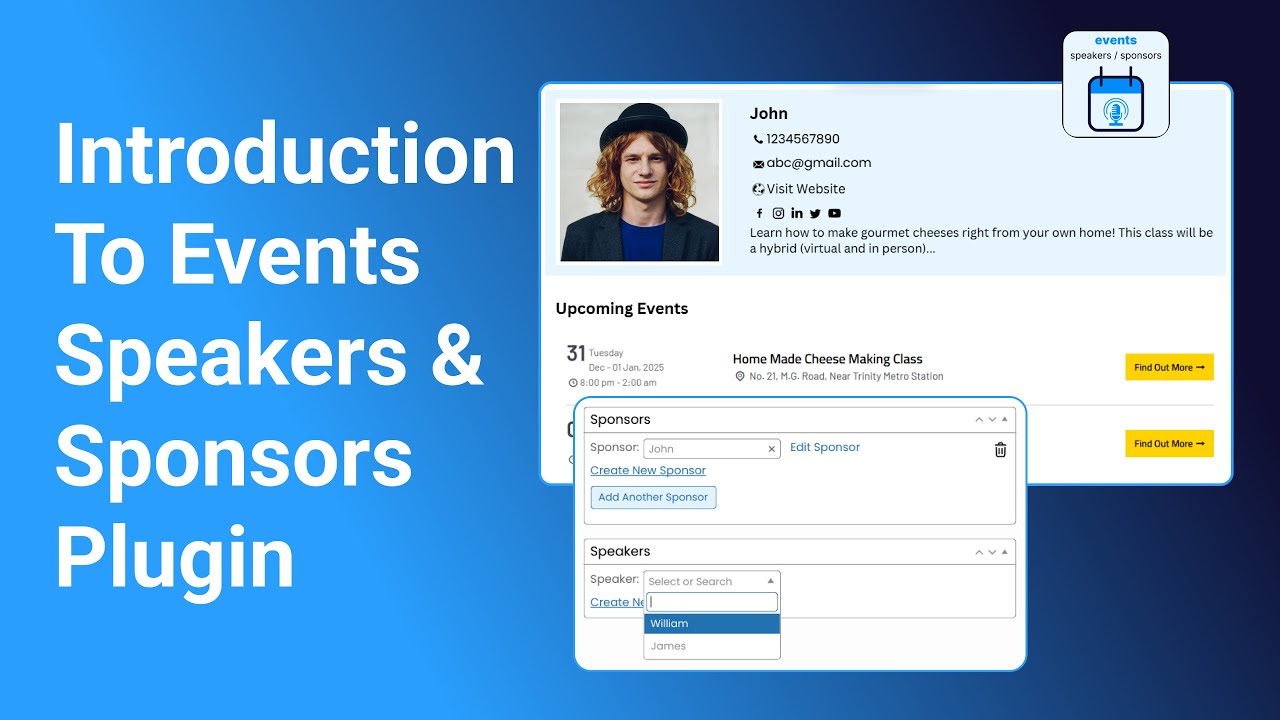
With the Events Speakers & Sponsors plugin, you can easily create and manage dedicated profiles for your event’s speakers and sponsors. You can highlight detailed information such as names, bios, contact details, social media links, and images/logos. Once created, you can display them on your events pages.
First, follow the steps below to create a speaker and sponsor for your event.
Add New Speaker
- From your WordPress dashboard, go to Speakers.
- A list of all previously created speakers will be displayed. You can view, or edit them.
- To add a new speaker, click the Add New Speaker button.

Now, fill in the following details:
- Name: Enter the speaker’s full name.
- Description: Write a short bio highlighting the speaker’s background, expertise, and focus areas.
- Phone Number: Add a direct contact number.
- Email Address: Provide the speaker’s email for communication.
- Website URL: Add the speaker’s personal or professional website link.
- Social Media Links: Enter URLs for platforms such as Facebook, Twitter, LinkedIn, Instagram, or YouTube under the Social Information tab.
- Set the Featured Image of the speaker. This image will be displayed alongside their profile.
- Once all details are filled in, click the Publish button.
Output

Add New Sponsor
To add a new sponsor profile:
- From your WordPress dashboard, go to Sponsors. Here, you can view existing sponsors or add a new one.
- Click Add New Sponsor.

Now, fill in the following fields:
- Name: Enter the sponsor’s name or brand name.
- Description: Write a short description of the sponsor’s company or contribution.
- Phone Number: Add a direct contact number.
- Email Address: Provide the sponsor’s email for communication.
- Website URL: Add the sponsor’s personal or professional website link.
- Social Media Links: Provide URLs to the sponsor’s social media profiles.
- Use the Set Featured Image option to upload the sponsor’s logo or business image.
- Once details are entered, click the Publish button.
Output