The Organizer Page Template feature allows you to design and customize how your event organizer pages appear. Instead of using the default layout, you can customize your event’s organizer page using pre-made templates or design your own with Elementor.
You can view a live example of our Event Organizer Template With Elementor.
Follow these steps to create and apply a new template:
Create Organizer Page Template
- From your WordPress dashboard, navigate to Events Addons > Event Page Template > Add New.
- This will open the template editor screen, where you can create and manage event templates.

- From the Template Settings panel:
- Use Template On: Choose Organizer Page from available options.
- Apply On: Choose where your template should be used. You can apply it to all organizers or specific Organizers.
- Header: If there are two headers on your page, then you can use this setting to display only one.
- Pre-made Templates: The plugin provides 4 pre-made templates.
Note: Events Widgets Pro must be installed to use pre-made templates.
- Once satisfied, click Publish. A dialog box will open where you can select an event to preview how the template looks.
- Click Save Changes to save all the settings and changes you made to the template.
- Click Edit with Elementor to open the selected event in Elementor so you can customize or design the template.
Organizer Page Widgets
When building your organizer page template, you can use dedicated widgets to display event categories in different layouts.
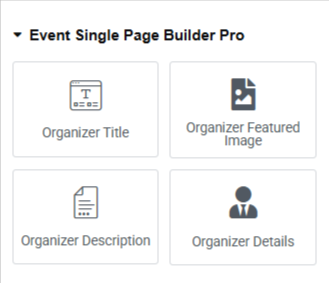
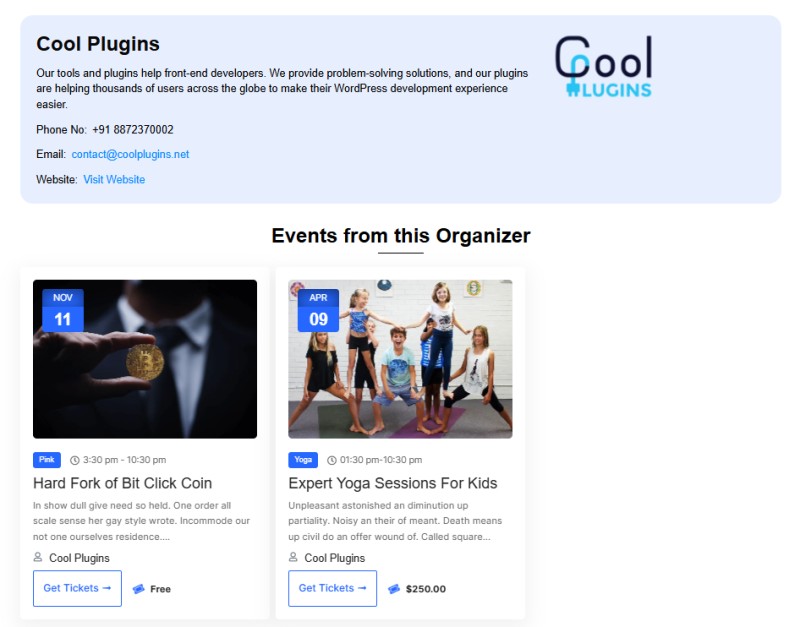
- Organizer Title: This widget will show the title of the organizer.
- Organizer Details: This widget will display the organizer’s details. This widget allows you to show organizer email, phone number and website data.
- Organizer Description: This widget will show the description of the organizer.
- Organizer Featured Image: This widget will show the feature image of the current organizer.
You can display the current organizer events on a organizer page using the Events Loop Widget from our other addon, Events Widget PRO. This addon helps you to design the event loop item design and use that to showcase your events in List, Grid and Carousel designs.

Output