If you don’t use Elementor, you can still design an Event Single Page using the Event Single Page Builder plugin.
Follow the steps below to easily design your single event page:
Create Event Single Page Template
- From your WordPress dashboard, navigate to Events Addons > Event Page Template > Add New.
- This will open the template editor screen, where you can create and manage event templates.
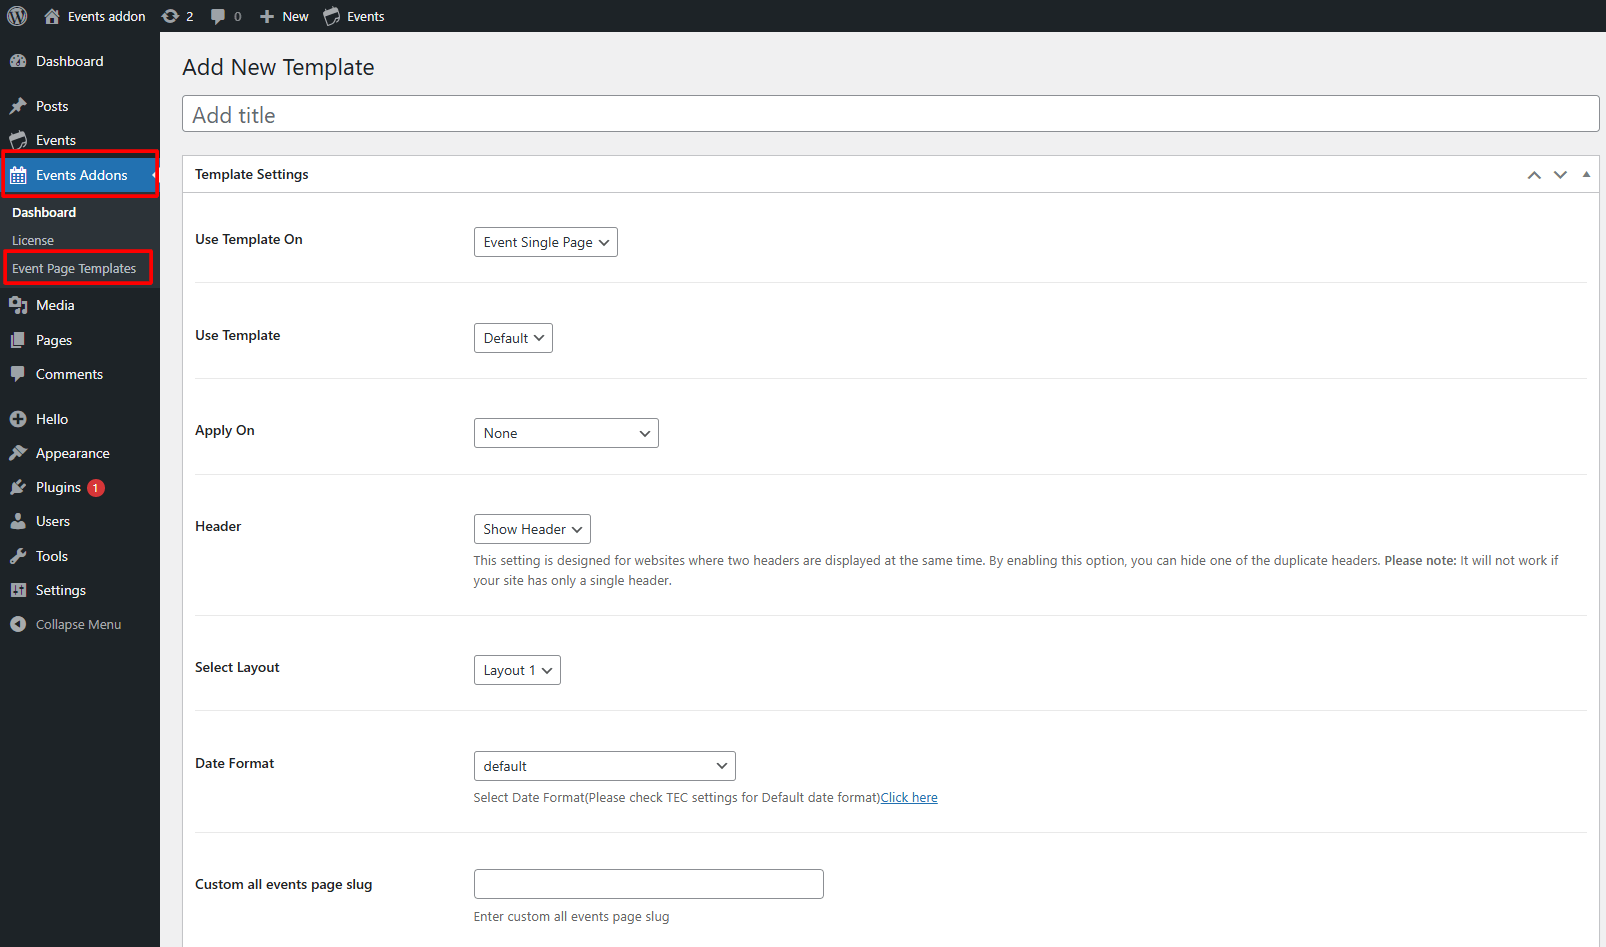
- From the Template Settings panel:
- Use Template On: Choose where your custom template will be applied. You can choose from, event single page, category page, venue page, or organizer page.
- Use Template: Select which predefined template layout to use.
- Apply On: Choose where your template should be used. You can apply it to All Events, Specific Category Pages, or to Specific Events only.
- Header: If there are two headers on your page, then you can use this setting to display only one.
- Select Layout: Pick from available pre-defined layouts (e.g., Layout 1, Layout 2, etc.).
- Date Format: Choose the format in which event dates are displayed.
- Custom All Events Page Slug: Define a custom slug for the “All Events” page link.
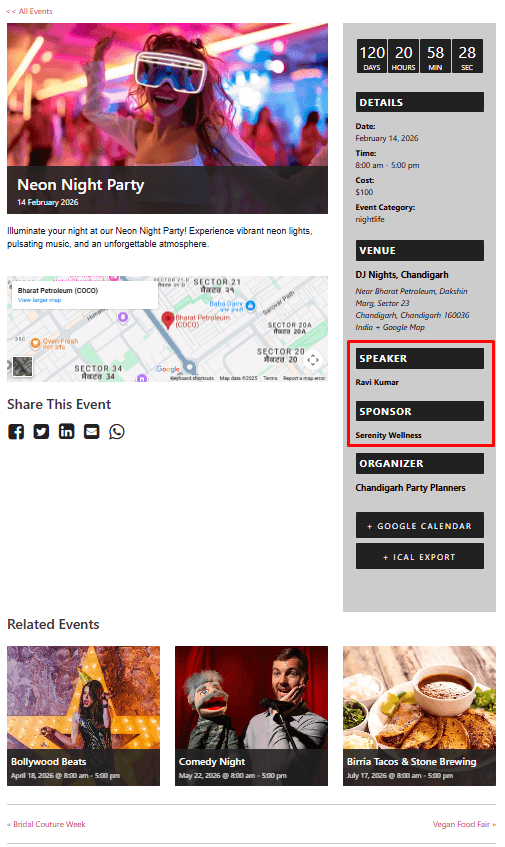
You can view an example of Event Single Page Template Without Elementor.
Customize Template

- Hide Share Button: Select if you want to remove the social share button.
- Hide Next/Prev Links: Select to hide navigation links to the next/previous event.
- Hide Related Events: Choose to disable the related events section.
- Hide Google / iCal Export Links: Removes calendar export options.
- Hide Countdown: Turns off the countdown timer for upcoming events.
- Template Primary Color: Choose a background color for headings.
- Primary Alternate Color: Select the text color displayed over the primary background.
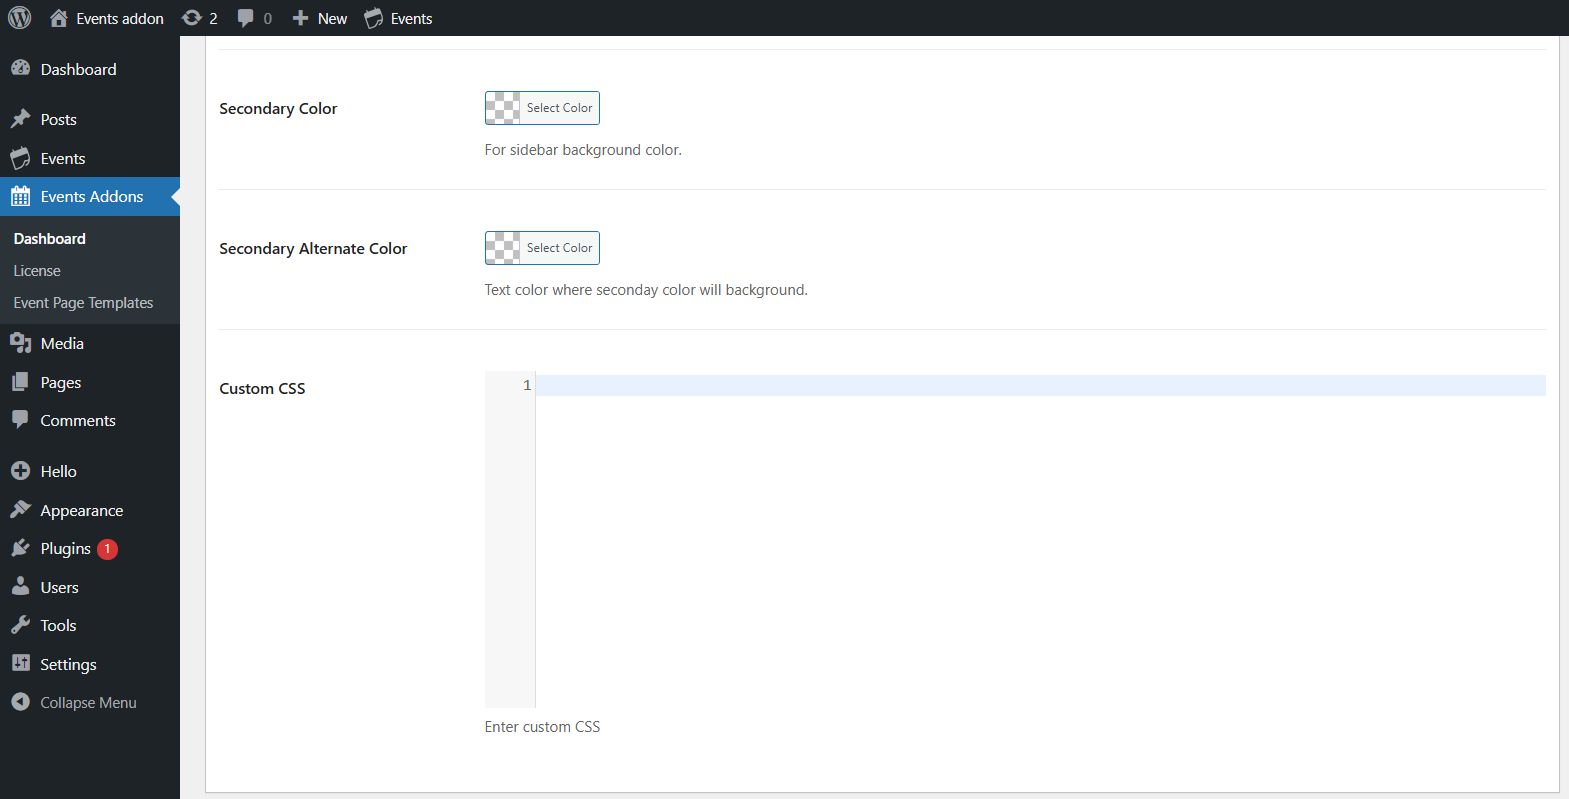
- Secondary Color: Choose background color for sidebar sections.
- Secondary Alternate Color: Choose text color displayed over the secondary background.
- Custom CSS: Use the Custom CSS field to add your own styles.
- After being satisfied with all the changes, Publish the page and Preview it.
Display Event Speakers and Sponsors
You can also display event speakers‘ and sponsors’ details on the Event Single Page (Non-Elementor Template) using our Events Speakers & Sponsors addon. Make sure the plugin is installed and activated. Once it’s active, the speaker and sponsor details will automatically appear on your event page templates.
Output