With Event Single Page Builder Pro, you can design and customize the layout of your single event pages directly inside Elementor.
Follow the steps below to build a single event template:
Design a Single Event Page
- From your WordPress dashboard, navigate to Events Addons > Event Page Template > Add New.
- This will open the template editor screen, where you can create and manage event templates.
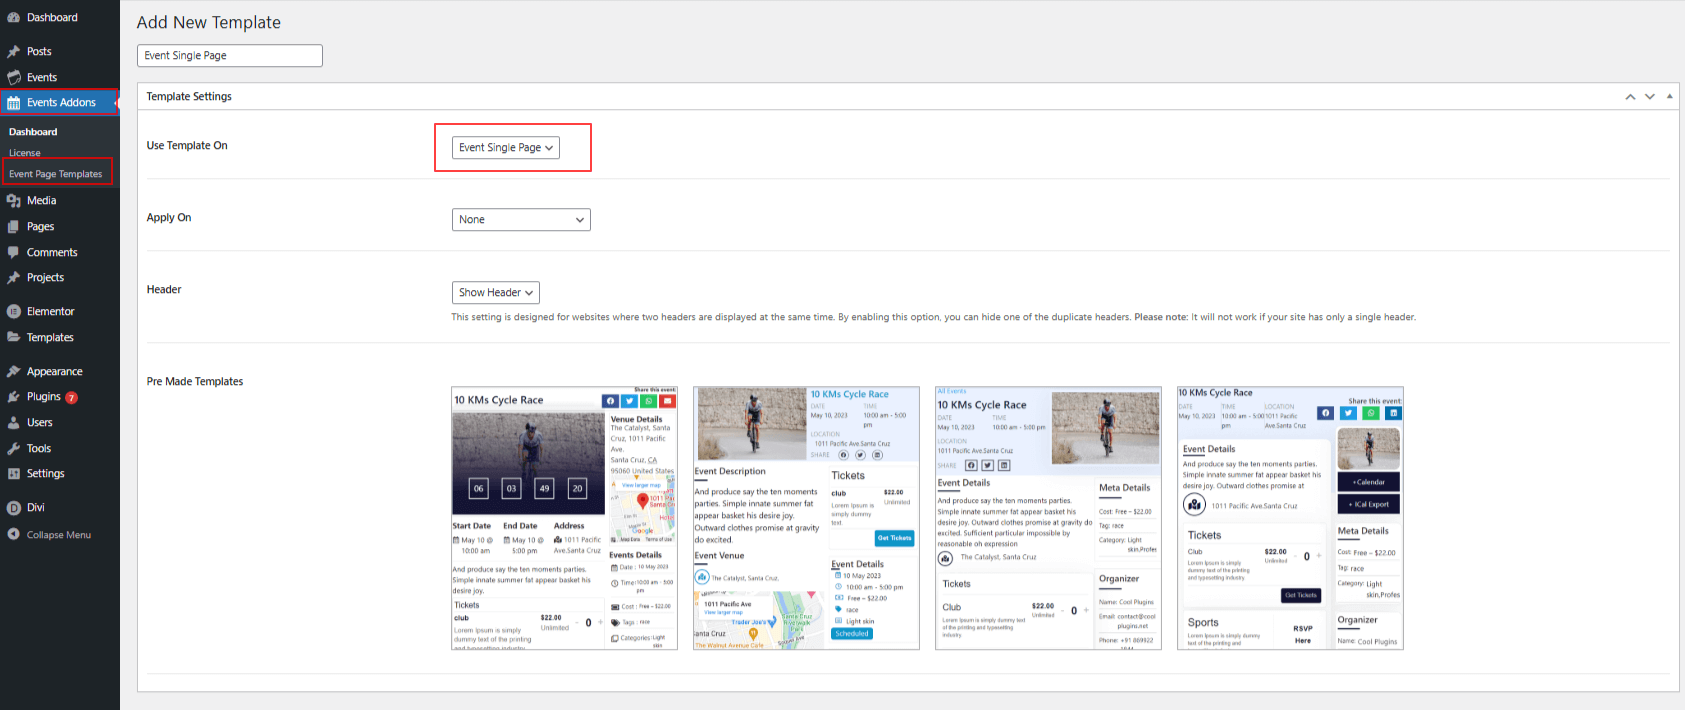
- From the Template Settings panel:
- Use Template On: Choose where your custom template will be applied. You can choose from: event single page, category page, venue page, or organizer page.
- Apply On: Choose where your template should be used. You can apply it to events from a specific category, or to specific events only.
- Header: If there are two headers on your page, then you can use this setting to display only one.
- Pre-made Templates: You can also select from 4 pre-made templates for single event pages.
- Once satisfied, click Publish. A dialog box will open where you can select an event to preview how the template looks.
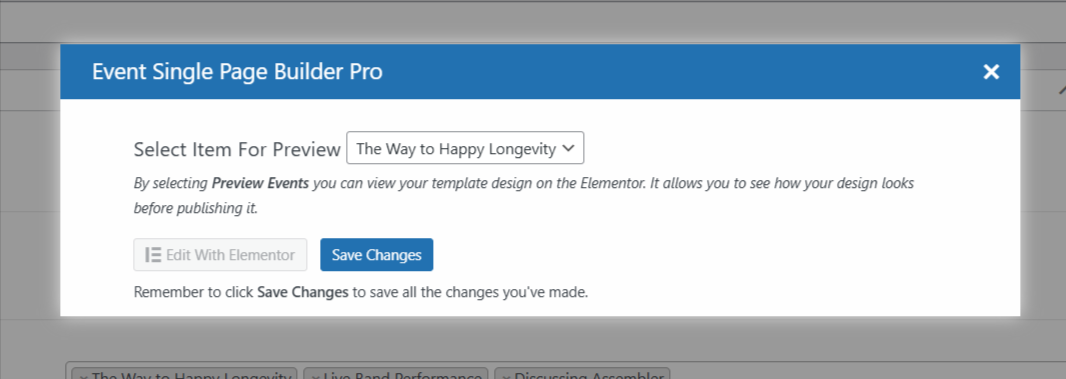
- Click Save Changes to save all the settings and changes you made to the template.
- Click Edit with Elementor to open the selected event in Elementor so you can customize or design the template.
Event Single Page Widgets
These widgets are available inside Elementor (under the Event Single Page Builder Pro tab). Drag and drop them to design your event layout:
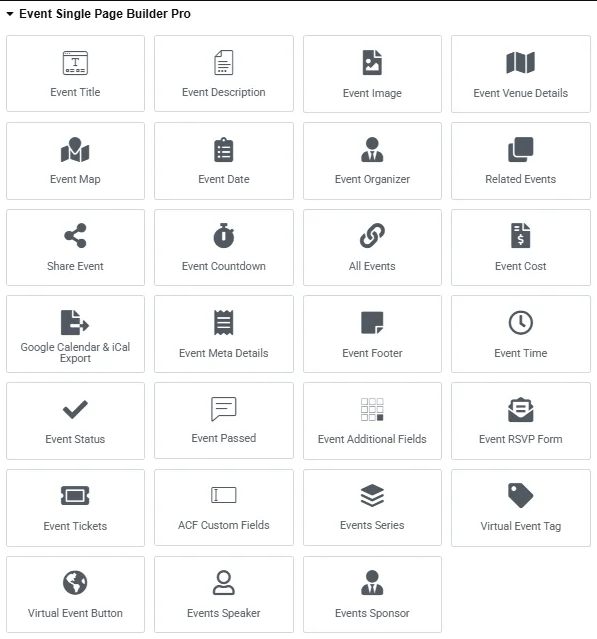
- Event Title: Displays event title.
- Event Description: Shows event description.
- Event Image: Displays featured image.
- Event Venue Details: Shows venue details.
- Event Map: Displays event location map.
- Event Date: Shows event date.
- Event Organizer: Displays organizer details.
- Related Events: Shows related events.
- Share Event: Adds social share buttons.
- Event Countdown: Displays countdown timer.
- All Events: Adds link back to all events.
- Event Cost: Displays event cost.
- Google Calendar & iCal Export: Adds save-to-calendar buttons.
- Event Meta Details: Shows event meta info.
- Event Footer: Adds next/previous navigation.
- Event Time: Displays event time.
- Event Status: Shows event status message.
- Event Passed: Displays text if the event is over.
- Event Additional Fields: Displays custom additional fields (label and value) added to the event.
(Note: RequiresThe Events Calendar Proplugin to be activated.) - Event RSVP Form: Displays the RSVP form block to collect attendee responses.
- Event Tickets: Displays the ticket purchase section for the event.
(Note: Requires theEvent Tickets and Registration pluginto be activated.) - ACF Custom Fields: Displays the label and value of Advanced Custom Fields (ACF).
(Note: Requires theAdvanced Custom Fields pluginto be activated.) - Events Series: Adds a link to the event series the event belongs to.
(Note: RequiresThe Events Calendar Pro pluginto be activated.) - Event Speaker Details: Displays detailed information about speakers, including their name, image, description, email, phone, website, and social media links or icons.
- Event Sponsor Details: Displays detailed information about sponsors, including their name, image, description, email, phone, website, and social media links or icons.
(Note: Requires theEvents Speakers and Sponsors pluginto be activated.) - Virtual Event Tag: Displays a “Virtual” or “Hybrid” label on the event page to indicate the event format.
- Virtual Event Button: Adds a “Watch” or “Join” button that lets users access the online event directly.
You can display the related events depending on the current event’s category or tag on the event page using the Events Loop Widget from our other addon, Events Widget PRO. This addon helps you to design the event loop item design and use that to showcase your events in List, Grid and Carousel designs.