If you prefer using Bricks Theme Builder and want to display your Events from The Events Calendar, you can easily display and customize events directly inside Bricks Builder using the Events Shortcodes addon.
Important: Make sure to install and activate the Events Shortcodes Pro and Bricks theme builder.
Follow the steps below to add the Events Shortcodes in Bricks theme builder:
Add Events Widget Element
- Create a new page or edit an existing page with Bricks.
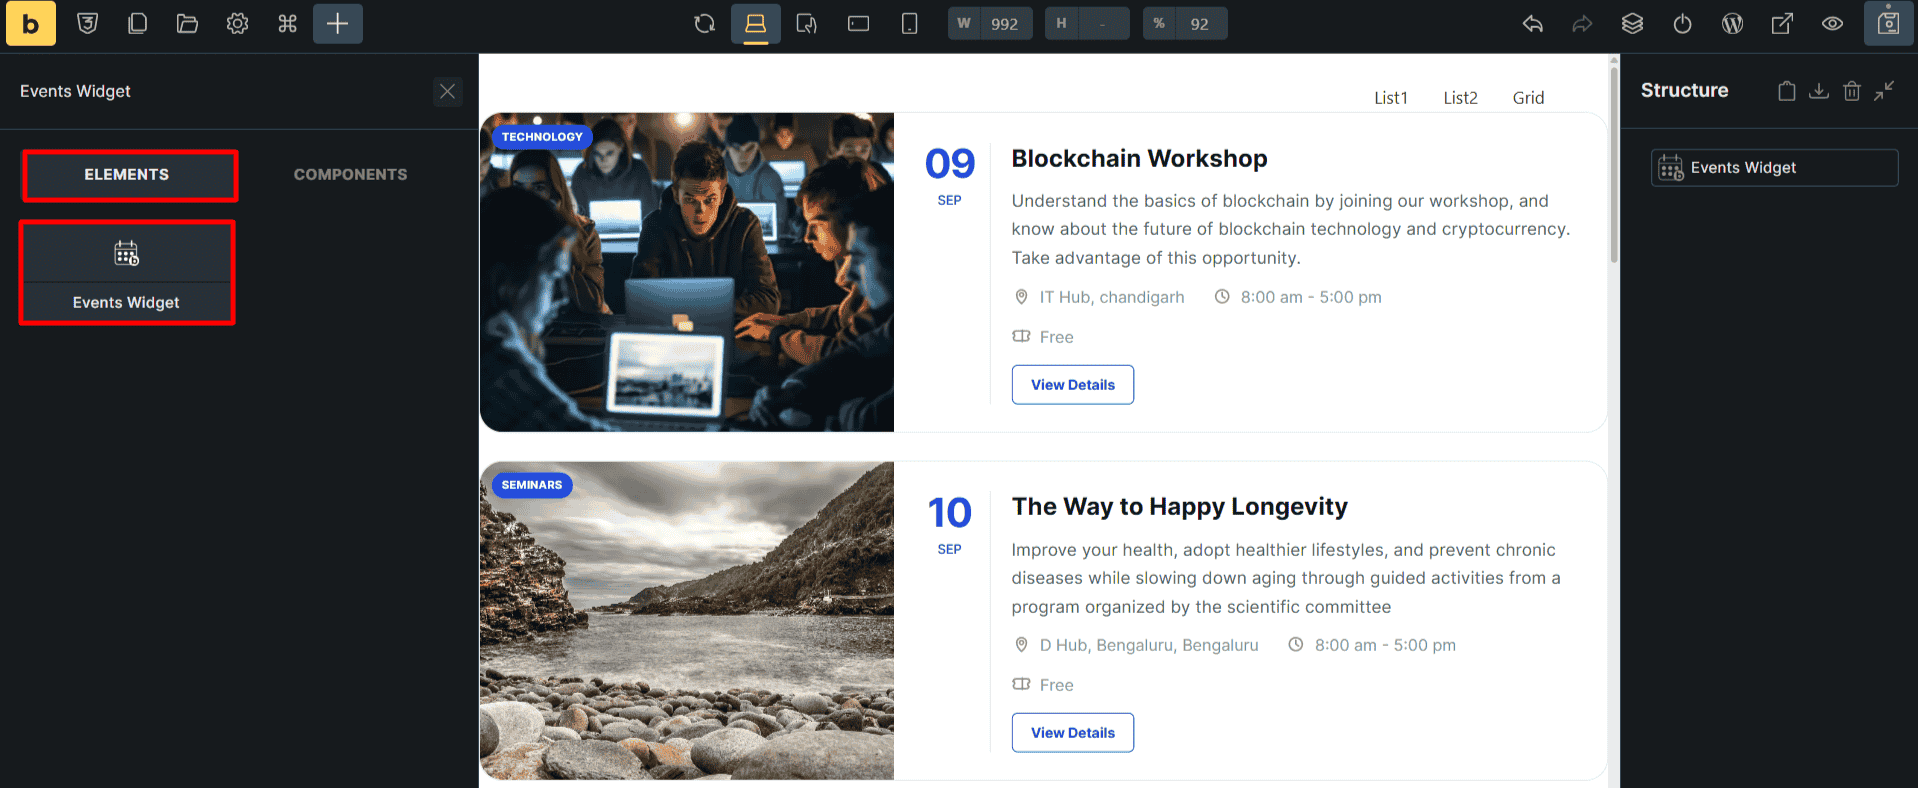
- From the Elements tab search for Events Widget.
- Add the Events Widget element to your page.
Customize Events Display
After adding the Events Widget to your page, you can fully customize the events by using the following settings:
- Content Settings
- Style Settings
Content Settings
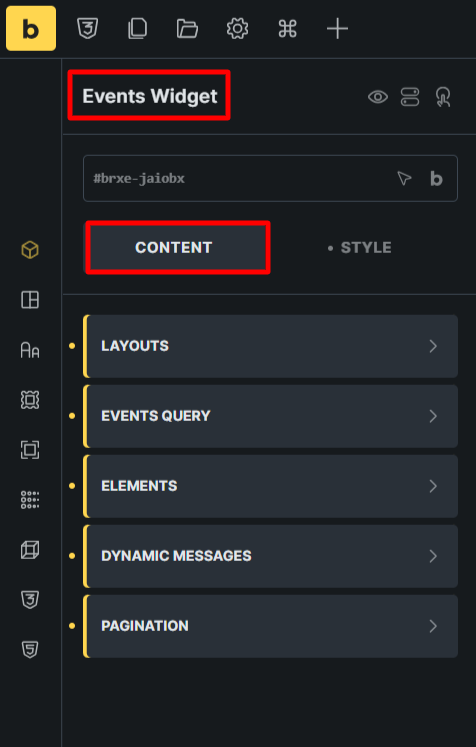
- Layouts: You can customize the layout of your events by configuring the following settings:
- Template: Select a template for your events from the available options: List or Grid.
- List: Display events in a list layout.
- Grid: Display events in a grid layout.
- List style: Select the style of the list layout from the available options: Style1 or Style 2. (Available only with the List template.)
- Date column: Choose how the event date appears in the list layout. (Available only with the List template.)
- Grid Columns: Set the number of columns in the grid layout. (Available only with the Grid template.)
- Display options: Choose to show or hide the featured image and event category.
- Card spacing: Adjust the space between each event card.
- Template: Select a template for your events from the available options: List or Grid.
- Event Query: Use the Events Query settings to control the display of your event pages:
- Types of Events: Choose whether to display All, Past, or Upcoming events.
- Event Categories: Select the event category whose events you want to display.
- Featured events: Choose to display All, Featured, or Non-Featured events.
- Event time: Display events from All Time or specify a custom date range.
- Number of events: Choose the number of events you want to display on one page.
- Events order: Choose the events display order from the given options: Ascending order and Descending order.
- Elements: Under the Elements setting, you can customize individual event elements using the following Content and Style settings:
- Content: Use these settings to control the display and behavior of different event elements, such as the title, date, time, venue, and more.
- Style: Use the style settings to customize the typography, color, alignment, hover effect, margins, and more of each element.
- To add a new event element, click the “Add Event Part” button.

- Dynamic Message: Add a custom message to display to visitors when no events are found. For example: “There are no upcoming events.”
- Pagination: Add the pagination options to your event pages. Toggle on the pagination switch and customize it using the following settings:
- Select Pagination: Choose the pagination type from the given options: Default or Load More Button, and customize the pagination text for each option.
- Normal: Customize the pagination styling for its Normal state by adjusting the alignment, color, typography, border, etc.
- Hover: Customize the pagination styling for its Hover state by adjusting the color, text decoration, and animation.

Style Settings
From the Style settings tab, scroll down and find the Events Shortcodes Pro Style Settings:
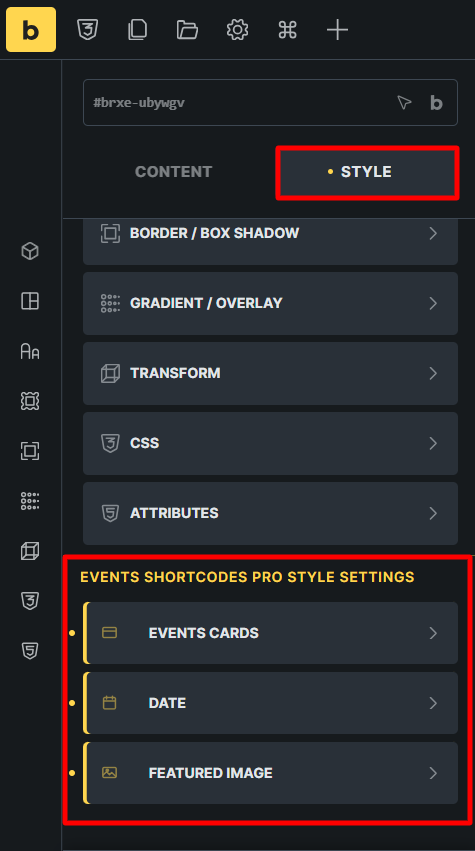
- Events Card: Customize the background color, alignment, card borders and hover effect of event cards and highlight featured events.
- Date: Customize the appearance of the event date badge by adjusting Inner Background color, Alignment, Typography. Choose the divider color that separates the date badge from the rest of the event content. (This setting is available in List template and Style 1 only.)
- Featured Image: Customize the featured image by adjusting its height, hover effect, overlay pattern, image category label, etc.
- Once you are satisfied with all the settings, publish the page, and preview it.